> For the complete documentation index, see [llms.txt](https://docs.myshell.ai/llms.txt). Markdown versions of documentation pages are available by appending `.md` to page URLs; this page is available as [Markdown](https://docs.myshell.ai/ko/create/pro-config-mode/tutorial/hello-world-with-pro-config.md).
# Pro Config를 사용한 Hello World
{% hint style="info" %}
이 챕터의 핵심 개념
* **렌더 유형**
* **입력/출력**
{% endhint %}
{% hint style="info" %}
For better readability of this code block, you could copy and paste this into any code editor app like [VS Code](https://code.visualstudio.org/) and select JSON as its format.
{% endhint %}
```json
{
"type": "automata",
"id": "hello_demo",
"initial": "home_page_state",
"inputs": {},
"outputs": {},
"transitions": {},
"states": {
"home_page_state": {
"inputs": {},
"tasks": [],
"outputs": {},
"render": {
"text": "Hello World! Welcome to this demo. Click 'Start' to chat!",
"buttons": [
{
"content": "Start",
"description": "Click to Start.",
"on_click": "start_demo"
}
]
},
"transitions": {
"start_demo": "home_page_state"
}
}
}
}
```
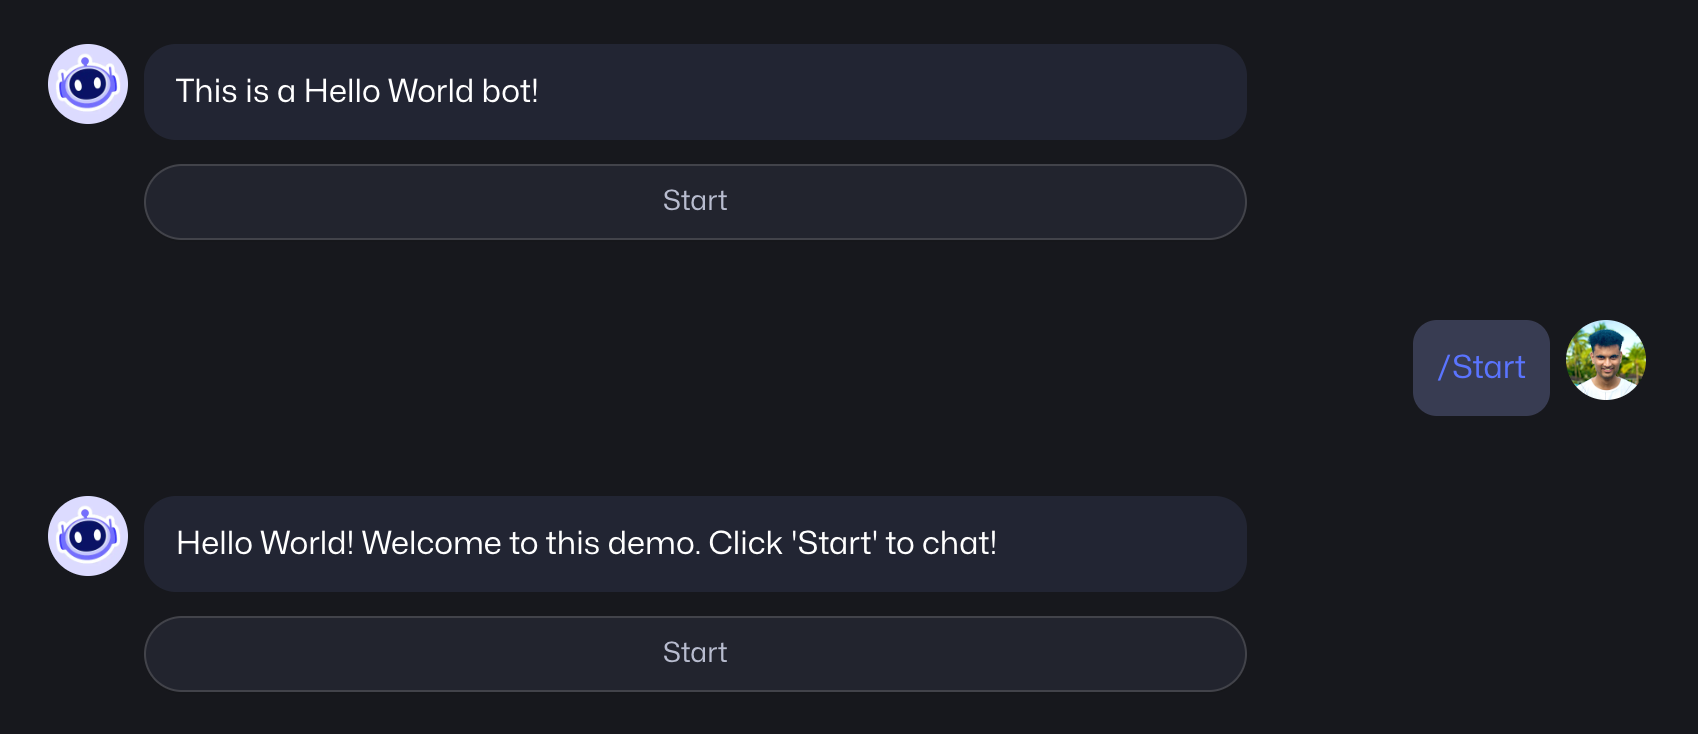
Above is the syntax with all the available fields for a Pro Config JSON file. Using the code above should allow you to do the following interaction with your bot.
Hello world using pro config
In Pro Config, each `Automata` can be defined using a JSON file. An `Automata`has a unified `id` and several states as its children. In the simple example above, the `Automata`has only one state called `home_page_state` which simply outputs an intro message. It also has a button called `Start` which can jump to `home_page_state` itself like an iteration (we will get to more complicated transitions in the future.)
#### AtomicState
An atomic state is a state executing real tasks, which usually are small functional modules, such as LLM module and TTS module.
These are usually embedded as a part of a bigger automata.
#### Automata
`Automata` shares many fields with `AtomicState`. They differ by the following:
* `AtomicState` has the lack of `properties.is_chat_allowed` and `tasks` fields.
* The different special events it can handle.
* `initial` , `states` and `context` fields.
Put in simpler words, one `Automata` can contain different `AtomicState`. Your Pro Config should be of the type `Automata` and tasks should be `AtomicState`.
For more information about the difference between AtomicState and Automata, please refer to the [dev doc](https://docs.myshell.ai/product-manual/create/pro-config-mode-beta/basic/automata).
### Defining Inputs/Outputs
The states of an `Automata` is a dictionary of `AtomicState` . An `AtomicState` take inputs from the user, process some tasks, return outputs, and render some content (such as text/image/button). In the example above, we rendered a text message and a button. \
\
We will now demonstrate how to add `inputs` and `outputs` to an `Automata`
In the example above, we are doing the following:
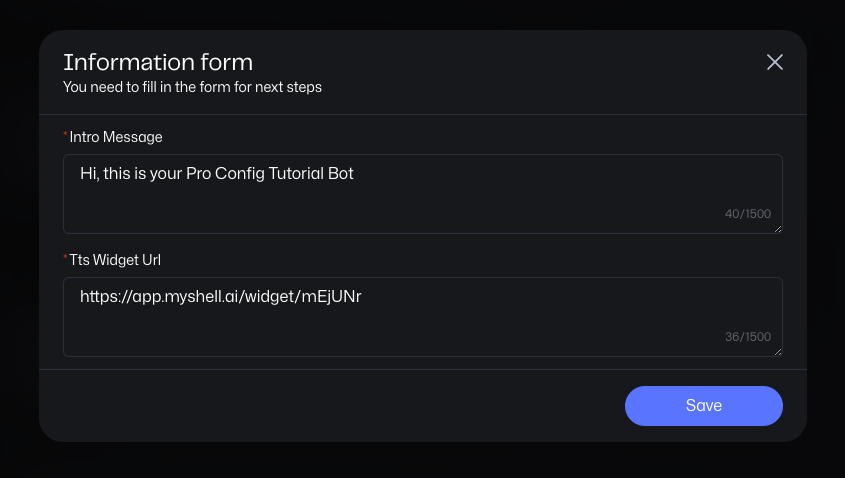
* **Lines 7-18:** Gathering inputs `intro_message` and `tts_widget_url` from the user. The type is `text` which means that the user will be prompted to input data (unlike `IM` where user needs to type in the chat to provide an input). If the `user_input` property is `false`, the user will not be prompted to input via a form, and a new variable with the value of `default_value` will be automatically generated.
Input fields prompted to user when input type text is used
* **Lines 19-22:** The `output` section in pro config runs after all the tasks are completed for the automata or atomic state. In this section, you can create or manipulate variables. This is also the place you can manipulate any variables you create in `context`. If you want to store output for the task performed, this is the way. We use an expression wrapped by double curly braces `{{expression}}` to assign the value of an output variable. The expression should be written in [JavaScript](https://developer.mozilla.org/en-US/docs/Web/JavaScript/Guide), adhering to the [ECMAScript 5.1](https://262.ecma-international.org/5.1/) standard, as we currently support only this version. In the example, we are using this section to save the inputs to variables.
Now, you have learned how to build a basic app with inputs and outputs. In the next chapter, we will learn how to build a workflow to achieve more complicated functionalities empowered by AI Modules.
{% hint style="info" %}
Whenever you upload a new Pro Config, you can click the ≡ button on the bottom left and click "Clear Memory" button to reset your agent.
{% endhint %}